A FLIR is a thermal (infrared) camera. There are models that plug into your phone. I specifically bought this one.

Its main uses are to identify:
- HVAC leaks
- Insulation leaks
- Drafts around doors and windows
- Electrical issues in your walls
I first borrowed a FLIR several years ago from a friend, when we bought our home, to determine which windows were in most need of replacing, where caulk was missing, etc. Our home was built in 1942 – so it has a lot of.. ahem.. “character” when it comes to efficiency.
The FLIR was immensely helpful, but they are around $350-400, which is right on the questionable threshold of “an excellent tool but one that I will use only occasionally” for me. For that reason, for years I resisted purchasing one. But every so often I’d really need one, and after borrowing and renting them several times, I finally decided to purchase one. It has paid for more than itself, in heating and cooling savings.
This is just a fun post to show you what it can do.
Home Analysis
The temperatures shown here are relative; if you took these measurements on a day that is 20 degrees colder/warmer outside, the absolutes may change, but the spread is really what is important (aka the “leaks”). Most of these were taken when it was about ~50F outside.
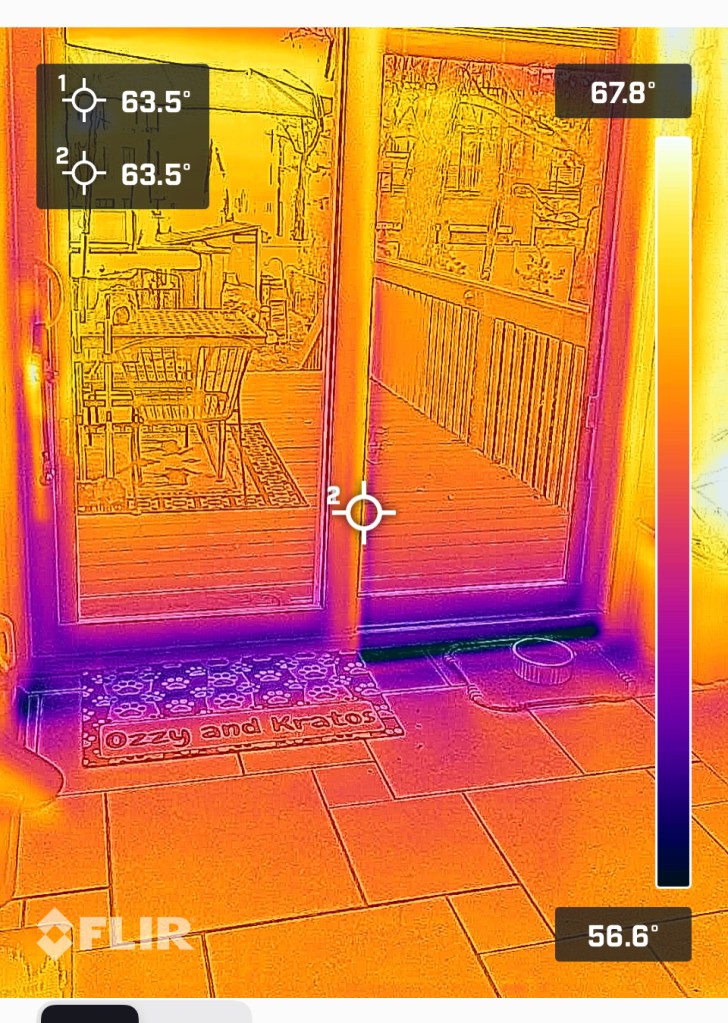
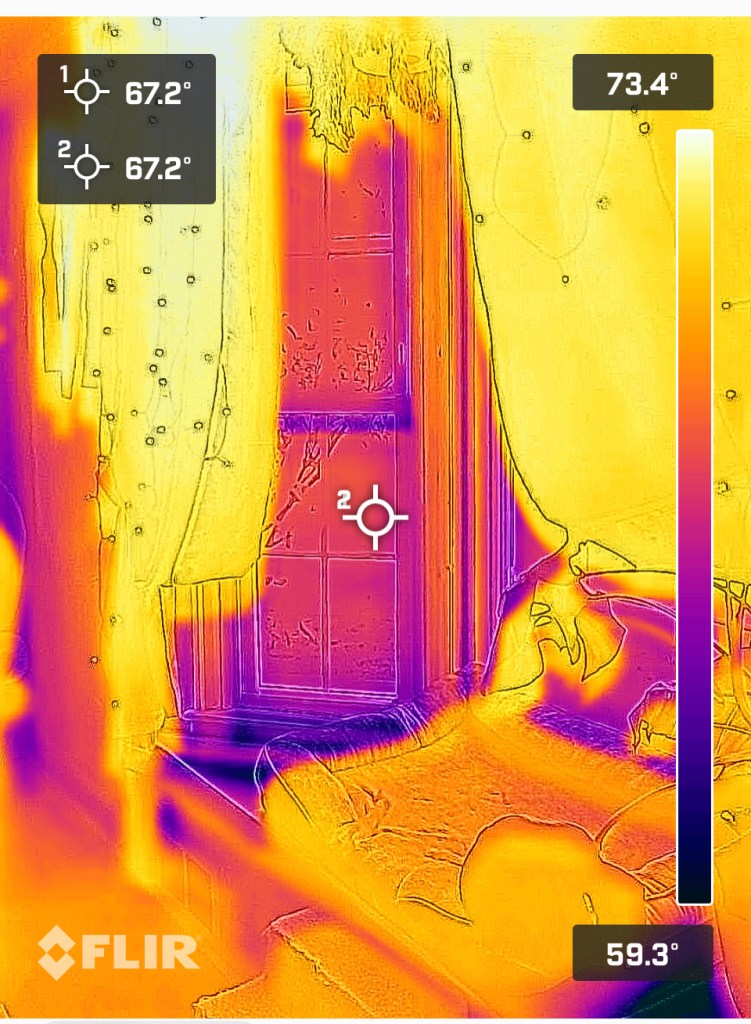
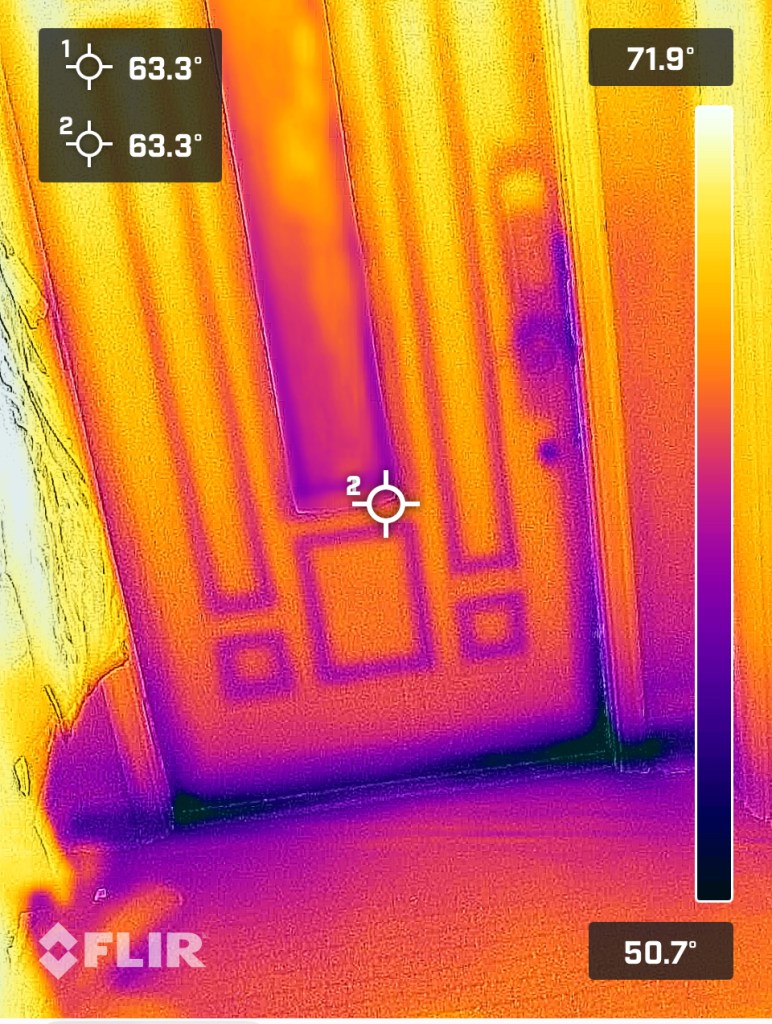
This first photo is inside my kitchen looking out through my deck door. You can see there is a spread of about 12 degrees F – which isn’t bad. However, the top and sides of the door seem much better insulated than the bottom of the door:
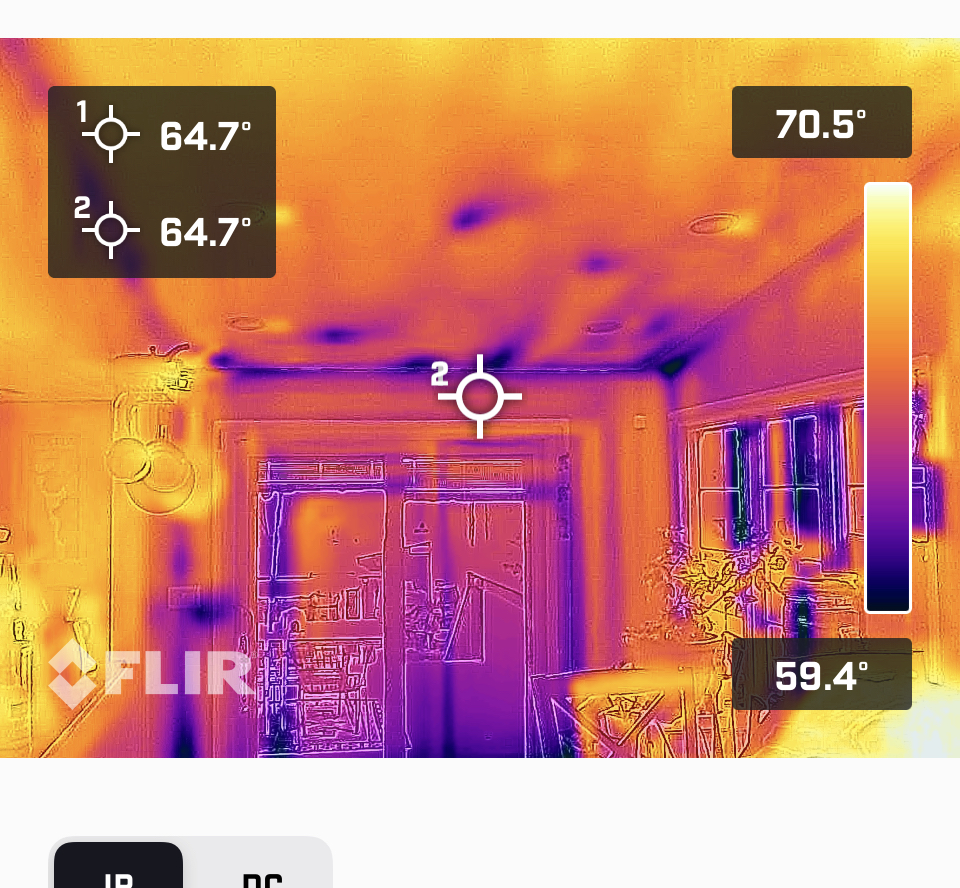
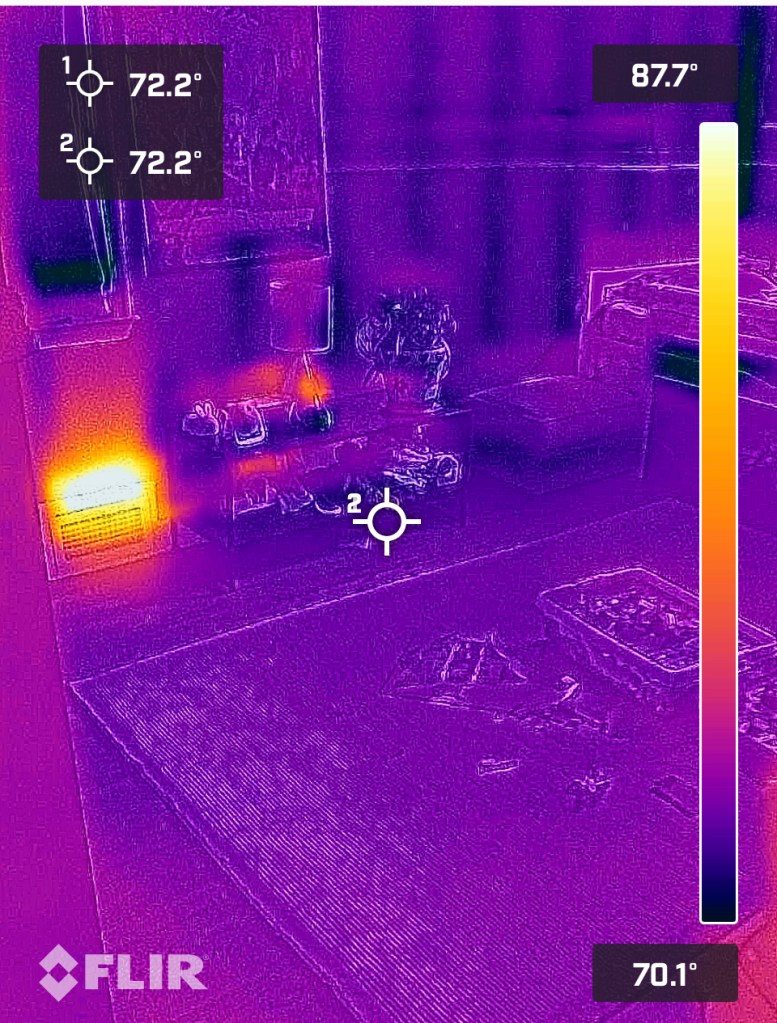
This next photo is of the same kitchen, stepped back a bit. Still only about an 11 degree spread, but there are clearly some spots that have a leak or are missing insulation; for example, there are four recessed light fixtures shown, but for some reason there are a few distinct cold spots on the ceiling.
You can also see that my deck door, which is brand new (ish), leaks much less through the panes compared to the old window on the right. Look at the large panes of glass on the deck door and notice how there are no distinct “cold leaks” compared to the windows on the right which are old, and, quite terrible apparently.
This is the last photo of my kitchen, which is interesting because it shows the heating duct that runs along the basement ceiling and underneath the kitchen (the bright horizontal strip).
There is another odd leak too – that purple spot right just northwest of the target – which is cold air from the crawlspace underneath leaking into the kitchen.

This next photo is taken in my living room, looking out our bay windows, which are also new. You can see the panes are doing a great job, however they are clearly leaking around the bottom:
Compare that to this original 1942 window (lead paint and all!), which is much worse and in need of replacing:

To see them side by side:

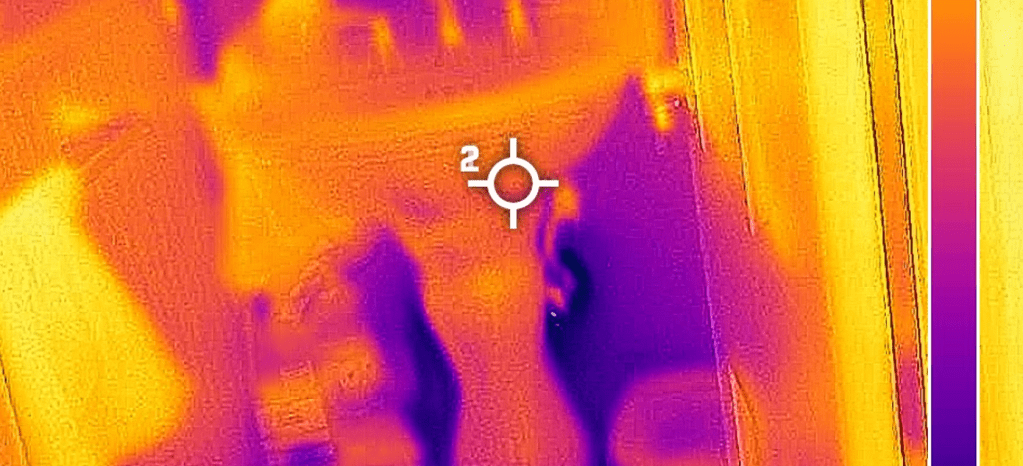
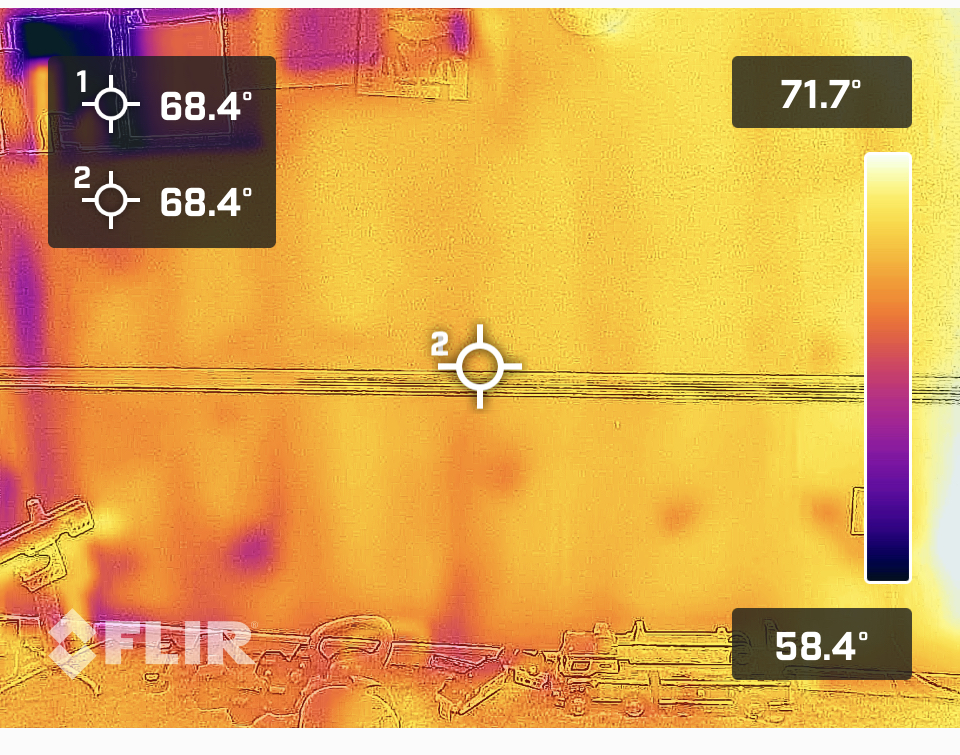
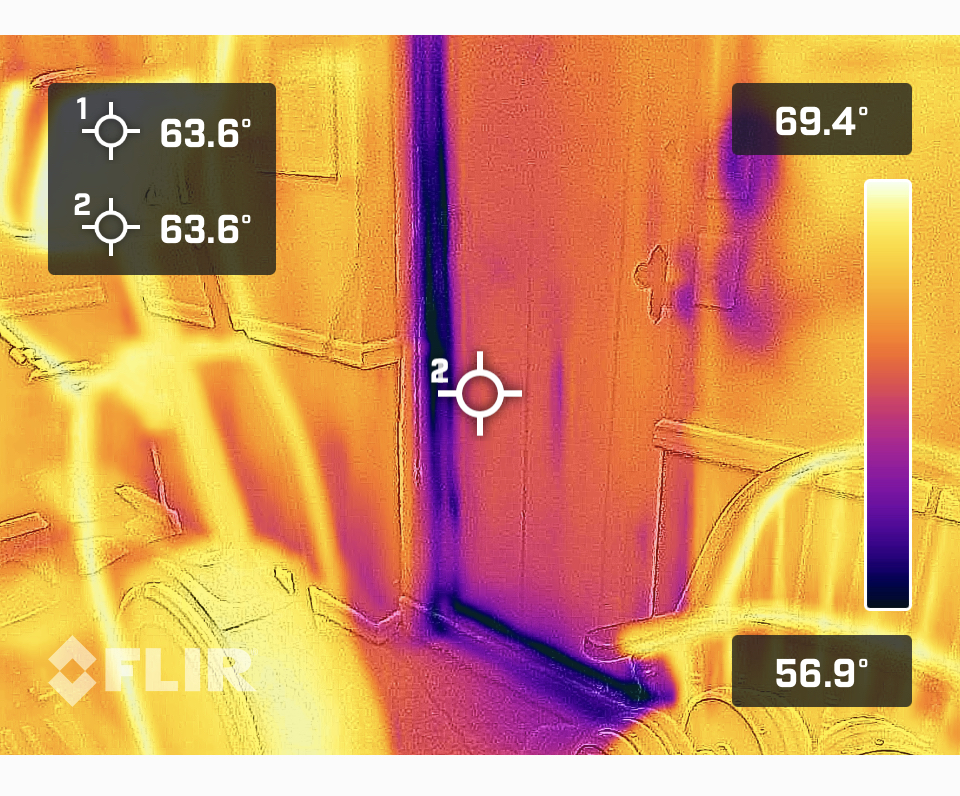
This next photo is taken in the dining room, and shows another heating duct in the wall. You can see the duct travels under the floor (from the furnace in the basement) and up behind the wall. Please ignore the oddly placed monitor stand on the floor.
This is a different view of 1) that same duct; the one on the right is the same one shown in the last photo, and 2) A different duct that comes right off the furnace.
Look at the temperature spread! We have 120 degree forced hot air coming out of that vent. If you want to know whether your heating (or cooling) is working, you can measure the air relative to the ambient air in the room – ie the forced hot air heat is ~55 degrees warmer.

Same photo but with dog included, getting his face blasted with 120 degree air. Dog is happy. And we have another vertical vent off to the left:
This next one is one of my favorites and is taken in a finished basement. Look closely at the back wall. The faint vertical streaks are the studs (behind the drywall)! Studs are are typically spaced 16″ apart. You could use this to tell whether you have irregular/”against code” studs – a better picture is shown below.
But you can also clearly see the insulation between them, and fortunately that insulation only has a few irregularities. The “coldest” gap near the bottom left is an outlet.
It also appears that my basement window is garbage – look how bad that pane of glass (upper left) is leaking.
This next photo is just to the left of that, showing a basement door that leads outside.. leaking terribly and in need of reparations.
To give a better idea of the studs, this is taken in an upstairs bedroom.
Remember, the temperature is relative. The “coldest” here is 70 degrees – the scale is different than prior photos. This room has new windows and has a heating vent so there is very little leakage.
Also, this shows about a 30 degree dropoff in the forced air temperature from the floor below. On the floor right above the furnace, the air was 120. On the top floor (at the longest run of the vent) it has dropped to around 90. I suppose some heat is “lost” in the walls in transit.
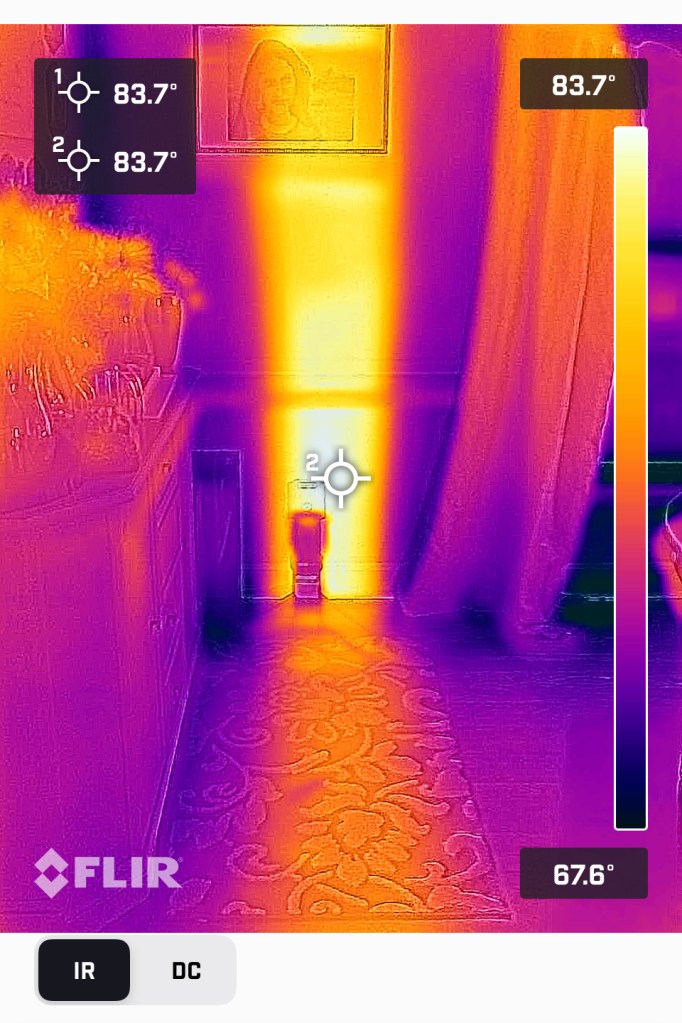
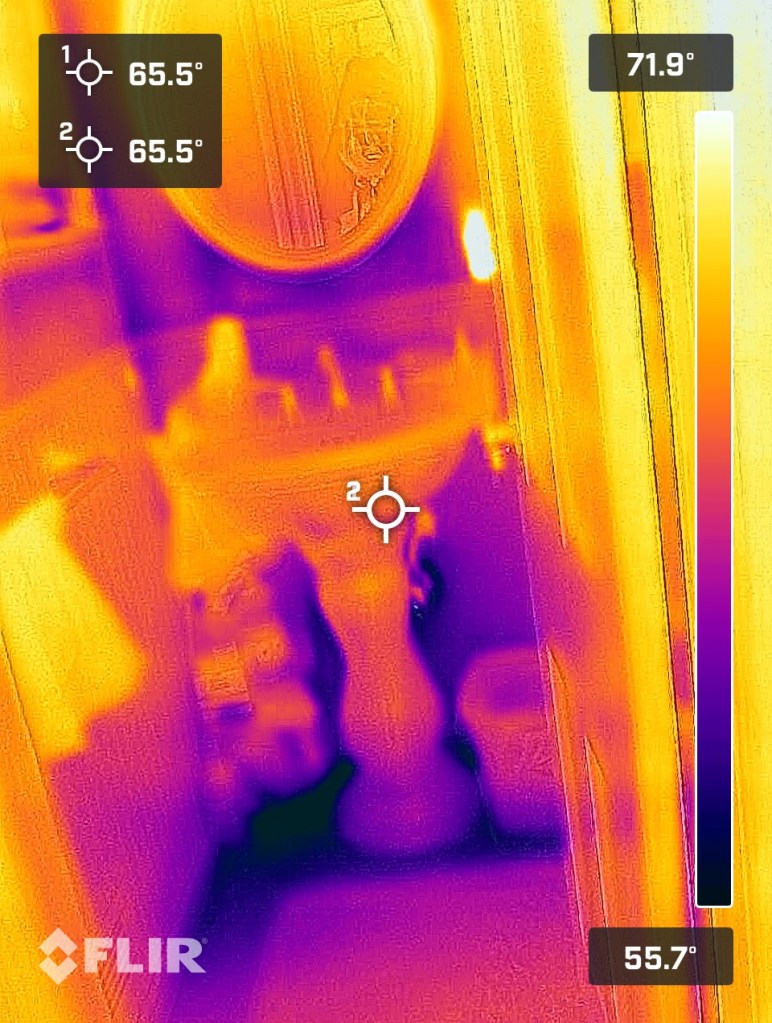
Have you ever stepped into a bathroom, and the room feels ok, but the floor is freezing? Behold – a horribly leaky downstairs bathroom. Here we have a 22 degrees spread; really bad, you can see a ton of cold air is entering, which is coming in from the garage (on the other side of this wall). There is also air leaking from behind the mirror, which is in need of some insulation.
Here is our front door with a bottom leak, but otherwise not bad:
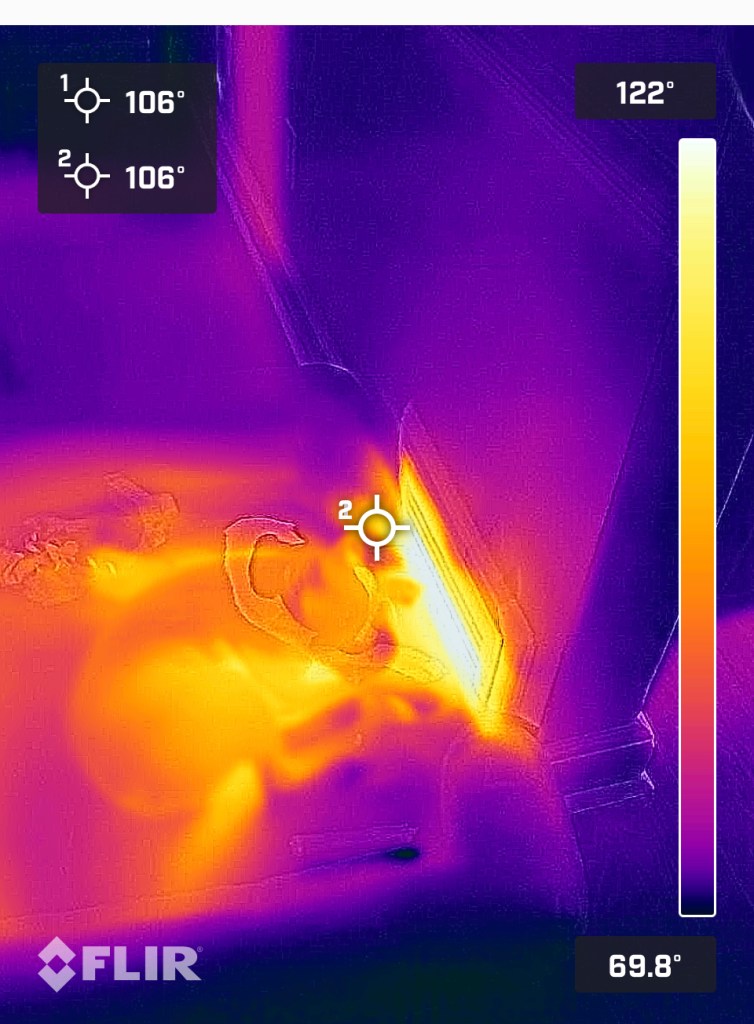
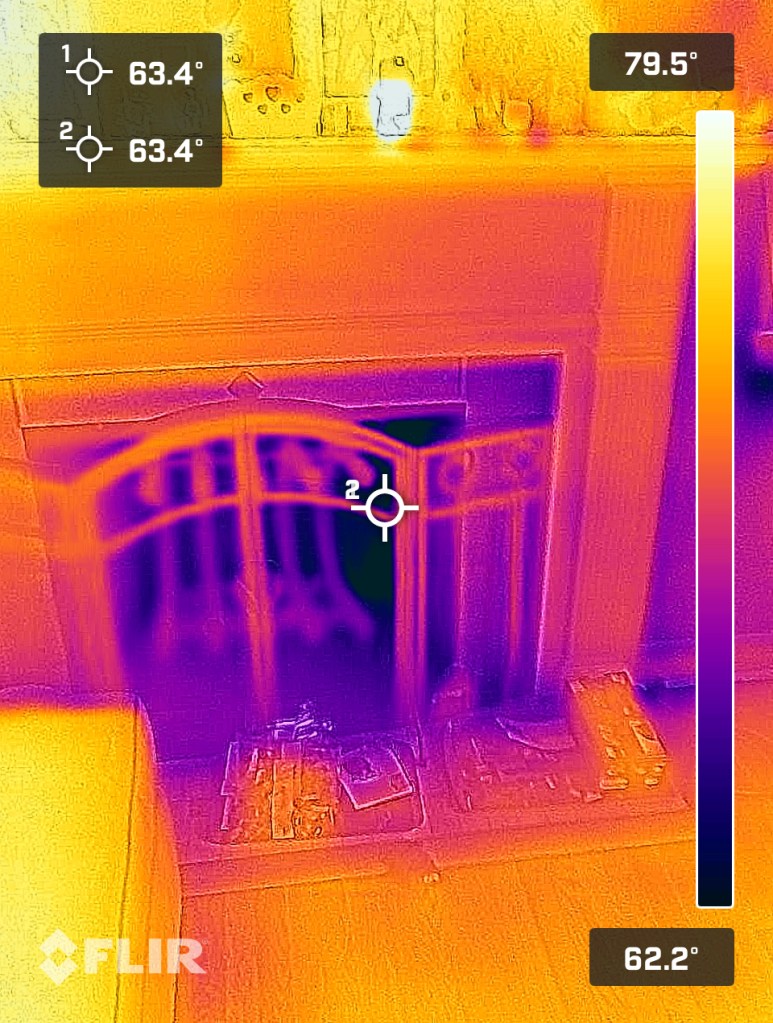
And an old fireplace that is clearly drafty:
Finally, heres a few shots of the wood stove. It captures around 300F on the outside:
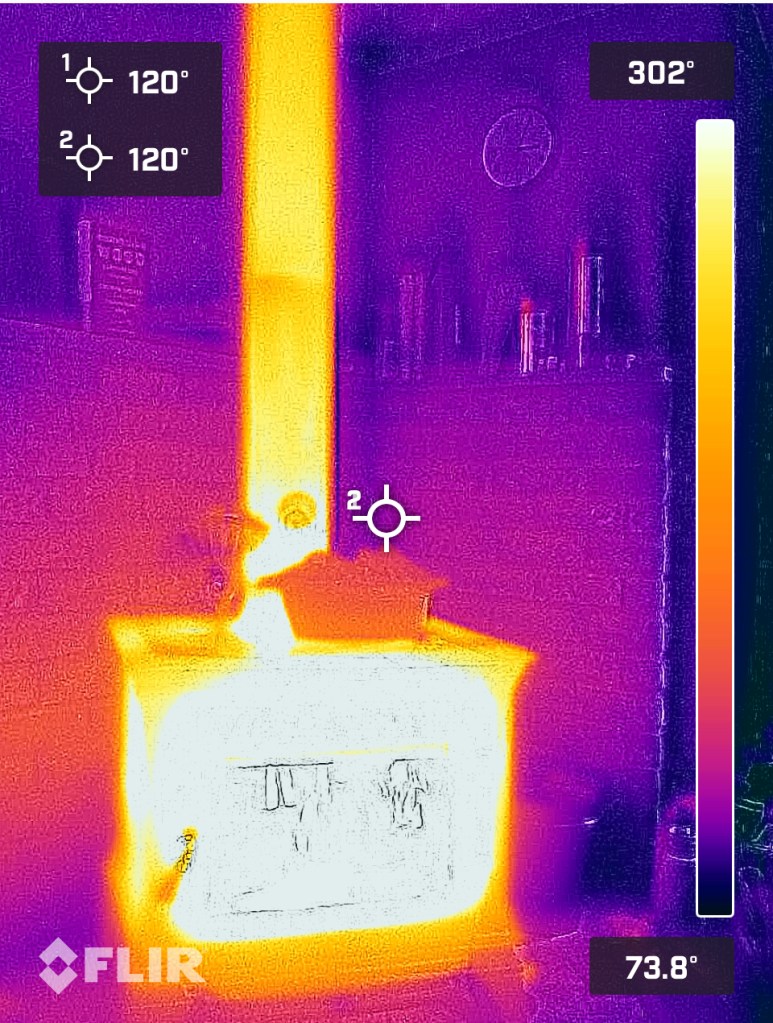
I think the limit of this camera model is around 300F, because the inside shows the same (I clicked “DC” mode which shows normal lighting). However I have another thermal sensor that doesn’t take photos, its a laser that you just point at a surface and it shows you the surface temp; that sensor shows the inside of the wood stove (the actual fire) at over 700.

If you’re purchasing a home, I can’t recommend this tool enough.